For the last day of behind the scenes of my food photos, it is food styling which includes background and props used to style the photos. After showing you my gear, the settings and the lighting I use for my food photography, it is now time for styling the food. Food styling is an art and it comes natural to some and I for one do not fall in that category, and I am by no means an artistic person. I have a difficulty matching and coordinating colors. I cannot conceptualize the color combinations and have to see it with my eyes to figure out which colors and combinations work the best. Sometimes my color combinations do not go well at all. You must be wondering why I am talking about colors and combinations for food styling? Well, we the food bloggers tempt our readers with our food pictures and how we tempt the readers depends on how we present the food. How the food looks in photos depends on the type of backgrounds used and the bowls and plates in which it is served. Backgrounds and props play a crucial role in food photography. Props include anything that enhances the look of the main dish and the photo in general such as bowls, flatware, napkins and more.
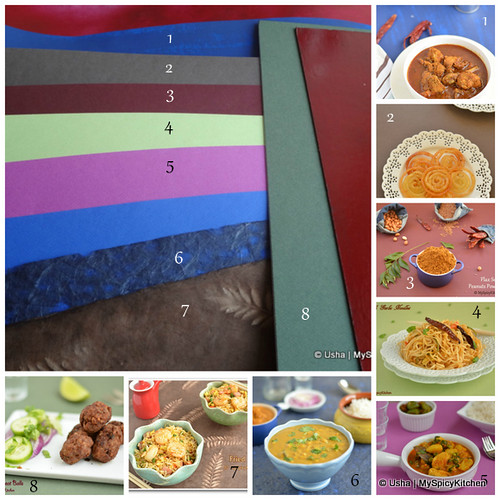
Backgrounds – Foam boards, painted wooden boards, shelf liners, colored charts, napkins, aged wood such as patio table, old wooden cutting board make great backgrounds. I don’t have any wooden boards and to paint a few have been on my to-do list for some time. I use foam boards, colored charts, wooden cutting board, placemats, napkins and anything that looks interesting as a background.
I used my wooden carving board and the aged faux wooden placemats a lot. These two are the most used backgrounds. The aged faux wooden placemat also works as a great backdrop for the carving board. In the below picture I used the carving board as the background the aged faux wooden placemat as the backdrop.

For the sel roi in the below picture, I placed a wax paper on the carving board which gave a different look and makes a great background. Parchment paper also works well which I used for oats upma but I like the wax paper look better. Shelf liners also make a nice background which I used for ultimate double chocolate cookies.

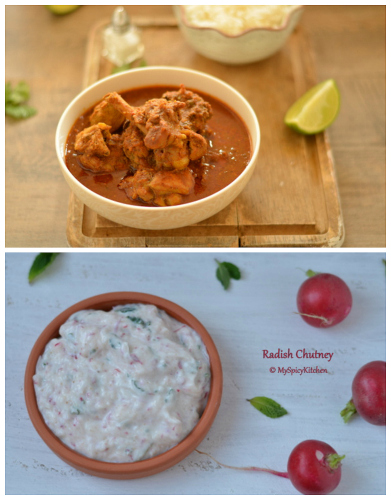
Used, aged and worn out wooden cutting boards also make good background. When I went to India 1 ½ years ago I saw mom using a worn out cutting board. I thought of getting it with me. When I went back 6 months later, I took her a cutting board and asked her to give her old board. Both my mother and sister-in-law were surprised and shocked that I wanted to bring that board with me. My mother even offered to give me her spare board. When I told her need it, she thought I was crazy! Well, as they say neighbor’s trash is a food blogger’s treasure. I got that board back and painted it white on one side which I used for radish chutney and the other side of the board for xacuti chicken in the below picture. Though I do not like the lighting in the radish chutney pic, I like the styling in it.
When I painted that cutting board, I also picked up some blue paint and painted the cardboard box blue. It gave nice texture to the board and used it in the baked tortilla photo.

Colored charts make good backgrounds but tend to soil very fast. One of my blue charts soiled and painted it with a dark shade of blue. I like the new look of this chart with two tones of color.
I also painted a white foam board which I used for mushroom cigars. As I said in the beginning, how food looks in a photo depends on the backgrounds and props we use. I like the painted foam board in the mushroom cigar pictures but am unsure about it in the peanut spread photo.
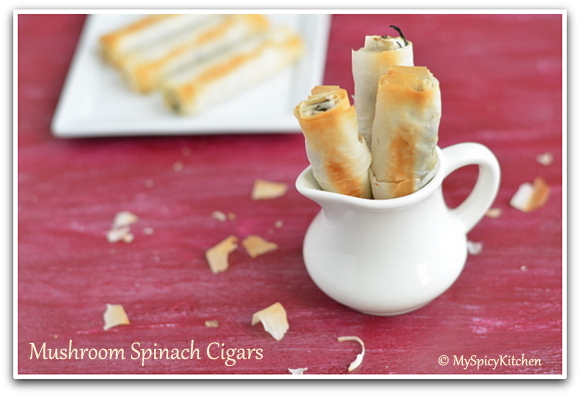
I like the cigar photo as the white props mellowed down the bright color of the board. I have 2-3 foam boards which are not working that well as backgrounds. I might paint those with some interesting colors. Although I have wanted to paint some wooden boards, after painting the foam board, I am wondering if I should paint foam boards instead of wooden boards. Foam boards are light & easy to store and carry around.
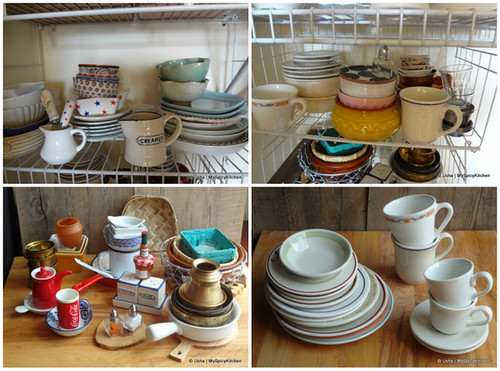
Props: A good food photo depends on the props we use and the way we plate the food. I normally like to use small plates and bowls to serve the food for the photos. I shoot in a small area and prefer small bowls and plates for the photos. The bigger the bowls and plates, the more space I would need to set up the photo shoot. I also like everything small so prefer and collect small bowls and plates for the blog. Buying props for the blog is fun but let me warn you, it could get addictive. These days no matter where I go, I usually end up shopping at least one prop for the blog. 🙂 Few days ago I was pulling out my props to take pictures for this theme and I was surprised how much I have collected 😮 If those were not enough, I bought quite a few stuff 10 days ago at Fishs Eddy. They had a sale going on and I picked up 4 cups and 8-10 plates at a bargain price. Most of the stuff was on salt for 50c & 99c. There are 2-3 plates that I picked up for $1.99. As I said, I like to use small plates and bowls and the plates were salad plates and saucers. I do visit the store whenever I am in neighborhood but never bought anything for such a low price and considering how low the price was, went bananas picking up the props. I do not have many plates and was looking for some plates. All the plates used in last week's photos are from Fishs Eddy. The fourth picture in the collage is what I picked from Fishs Eddy.
Most of my props are from Crate & Barrel and since the past few months from Pier 1 Imports. Pier 1 came to our neighborhood last fall and since then this has become my go to store. I still go to Crate & Barrel but the other one is just a few minutes walk from where I live. The other store I like to shop for my props is Sur La Table.
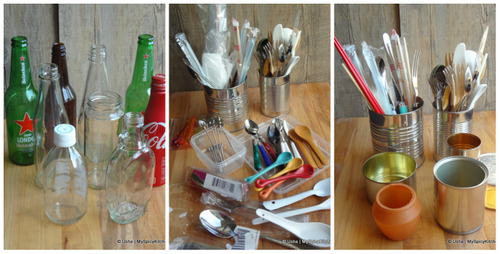
Apart from buying the props, we can use the bowls and plates that we use for everyday dining. Some of the interesting props that can be used in food photography are from recycle bin. Sauce and condiment bottles make good bottles to use in the photos to serve water or beverages. Beer bottles are a nice prop to include in the photos of grilled food. There is one restaurant we visit often and they have these cute coke bottles. Last time I was there, I got home an empty bottle. Mr.U wasn’t happy about it and gave me are you out of you mind kind of look. But I did not care! Metal cans also make great props. I have few cans that I saved after using up the fruit, tomatoes and spices. I used one in the sel roti and toritlla chips photo. These metal cans can also be used as flatware holder in the photos.
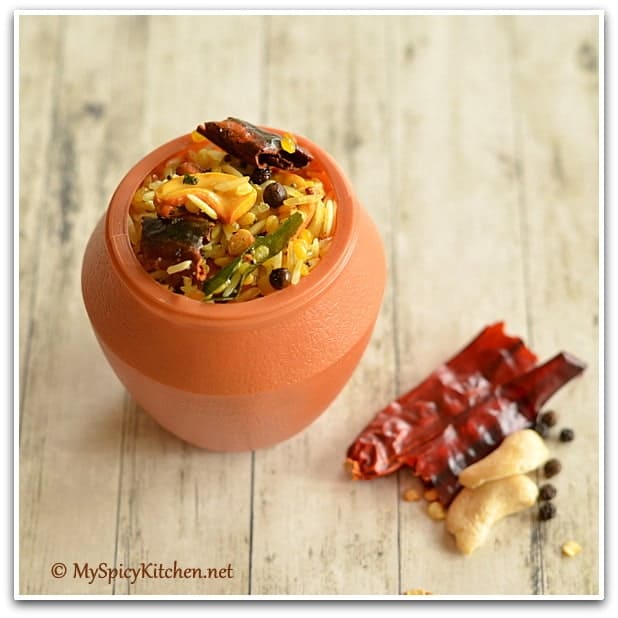
Few years ago I bought kulfi from the Indian store and the kulfi was in a plastic mutka (pot). I did not know what I was going to do with it but saved one pot. After saving it for years, finally used it in for my Pongal mix photo. The background for this photo is a 2" x 2" chart. I like wooden backgrounds and since I do not have any, I pick up anything that looks like wood and this chart is one of those which I picked up for $1.50 each.
Miniature or single serving jam and preserve bottles, tabasco sauce bottles make good props too. I got couple of tabasco bottles from a paid event we went to where lunch was served and Mr.U again gave me those looks. I did not care. I wasn’t steeling and I paid for the lunch. Recently Bed Bath & Beyond near my house started selling food too and sell these mini bottles of condiments. I still have the tabasco sauce I got from the event and so bought a mini jam bottle. Wish I had bought it before I took the scones picture and it would have made a good prop in that photo.
Mini wooden cutting boards, cheese boards and wooden coasters also make great props. In the chicken empanada photo, I used bar cutting board to place a metal bowl of empanadas. The bowls are iron bowls that used to do tempering. I picked it up from the local Indian store. Also, stacking bowls bowls or plates looks interesting in photos.

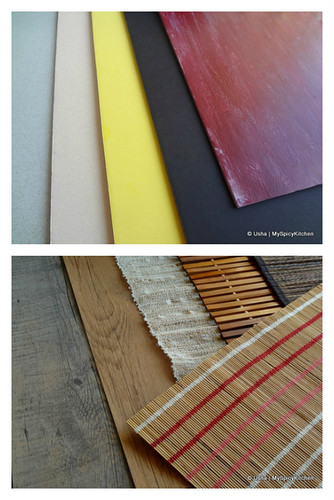
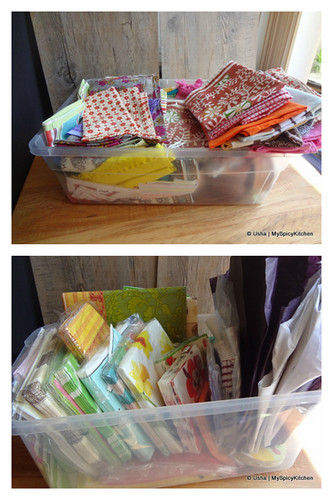
Apart from collecting cute and fancy props, it is also important to store all the props at a place that is easily accessible when taking pictures. That is something I need to figure out. I have my props all over the place in the kitchen and my guest room. Yet times I do not even know what have and where it is. To put some of the props in one place, I made some room in the closet and put some of the stuff there. Mr.U saw those and was not happy that I put plates and bowls in the bedroom closet. Well, for now that is where they stay until I buy a cabinet or a cupboard where I can put all my blog stuff in one place. The collage of props are the props I stored in the guest room. I have some more in the kitchen but did not have patience to pull them out, take pictures and then put them back.
Food Styling: Now that we got the background and props, how do we use these in our pictures? I do not have a specific style I follow. I usually struggle with styling. Before I take pictures, I look at food photos on various sites for inspiration and ideas. One cannot imitate a picture to T as the props and setting would be different but we can use the ideas to create our own style of photo. I look for photo ideas on foodgawkar, tastespotting and sometimes even pinterest. I usually pin the pictures I like to pinterest as it is easy to go back to my pinterest boards for ideas. Even after gawking on various good porn sites leaves me clueless as to how to style, I go for the easiest styling. Place the food on the board, throw in a napkin, flatware and if the frame still looks empty, throw in an herb. I usually use coriander leaves a lot in my cooking and end up throwing one or two sprigs of coriander into the frame.
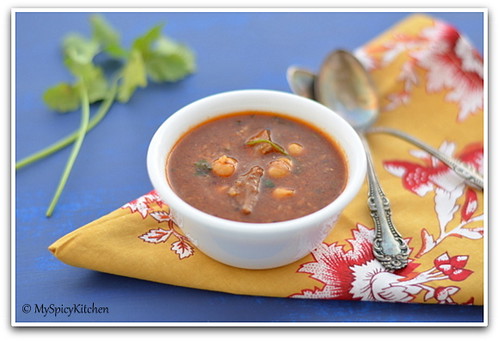
At times I add a dipping bowl of sauce or ingredients used in the dish to fill the frame. Also, if the frame needs some color, I place one of the colorful key ingredient in that recipe. I am not satisfied with the thai chicken photo where I used a blue painted chart as the background. For that photo, to add some color I placed some red chilies. I could have used even used coriander leaves but felt red would pop out on the blue chart. However, for this soup photo I chose to use the coriander sprigs as the yellow napkin had already added enough color. To fill the space in that frame, I placed two coriander sprigs.
Soups and gravies are tricky to style as the vegetables and meats tend to sink into the bowl. What I normally do is layer the vegetables or meats in the middle of the bowl, fill the soup or gravy and style the photo and adjust the camera settings. When everything is as I want, then just before taking the final picture, I top it with the meat or vegetables from the soup or the gravy. In the above picture, I kept aside some meat and chickpeas. Just before taking the final picture, I place the meat and chickpeas on the top. I wanted to show what went into that dish.
Some of the simplest styled pictures are one of the best pictures I took. Such as this spicy peanuts and peanut powder photos. When picking backgrounds and napkins, I try chose to complimenting colors though I do not always stick to it. Using complementing colors helps in bringing out the color of the food.
Food styling is a vast subject and it is difficult to put it all down in one post. These are some of behind scenes of my food pictures. I feel I am still missing out a lot of stuff that happens behind the scene but at the same time I can not analyze behind the scenes of each and every photo I took. Again, I have a lot to learn in food photography. This is how I take my pictures and behind the scenes of my good photos. Happy clicking!

Rhea kanthirao says
Where can I find foam backgrounds or pvc backgrounds for my food photography?
MySpicyKitchen says
I don't know where you live. In the US you can check arts supply stores and craft stores for foam boards. Michaels carries foam boards. Check Amazon and Etsy for backgrounds. Hope this helps.
Cherie @ FoodRecipesEasy says
Wow ....really a great post. This is very informative .... and helpful for newbies like me. It's a tough job to secure all the needed props at one place.
Chef Mireille says
this is so helpful and informative
Alyssa says
Great post! So much goes into a high-quality photograph of food. You have some great techniques.
Priya says
Mindblowing post there, so much of information, so much to learn and thanks for doing this wonderful post Usha, i have to search for chart paper here, thanks a lot.
Simi Jois says
Loved reading the post, thank you for the effort. There is so much to learn. I just love your spoon collection.
Varada says
What a great post! You have so many tips and ideas! Thank you for taking the time to write this up.
cookingwithsapana says
Very detailed and informative post . Thanks Usha , go through again and note the main points.
Harini says
Very well composed Usha. I love your collection of props. Using chart paper is a good idea! However, as you mentioned, storing all of them in easily accessible spots is a challenge!
Pavani says
Amazing post Usha. So much information and such lovely pics. Will have to read the post in leisure again.
Suja says
Wow..such a detailed post loaded with useful infos. Thanks so much Usha. Still chewing in your content and I hope to read again and jot down in point form. Inspiring post.
kurinji says
Very very informative and useful post...
Srivalli says
So beautifully written Usha..very useful..will be reading it couple of times to get everything in..:)
Sarita says
Ohh thanks for the detailed explanation.Definetly a great chance to learn about all these procedures..
denise says
a very detailed post, it was very interesting to know how you arrive at those beautiful pics...