
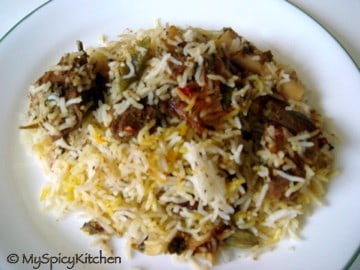
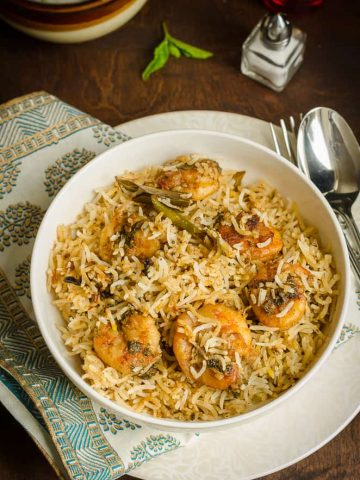
Shrimp biryani an aromatic shrimp rice preparation where marinated shrimp and partly cooked rice are arranged in layers and cooked on a low flame to perfection. A must try entree for special occasions and weekend meals.

Table of contents
Biryani is one of the most popular dishes in India and one of the most popular biryanis are Hyderabad biryani. Mutton biryani and chicken biryani top the list, followed by kheema, fish and prawn.
Fragrant basmati rice cooked with marinated protein of choice on low flame, in an air tight container is one of the must try dishes. Preparation varies depends on the region and one of the popular ones is Hyderabad biryani.
There are two styles of cooking; kacchi biryani and pakki biryani. Key difference between the two is, in former raw protein and in latter precooked protein is arranged in layers along with rice and then cooked in dum style. Here is my pakki shrimp dum biryani recipe.
Born and raised in Hyderabad, I cook Hyderabad style biryani. Biryani with some raita or salan is a hearty, satiating meal.
Ingredients
We can divide ingredient list into 4 categories. Biryani masala or garam masala, marinade ingredients and ingredients for cooking rice and rest of the ingredients.
Biryani Masala or Garam Masala - My list for the masala is basic and simple. Cardamoms, cloves, cinnamon stick and shah jeera (caraway seeds). Sometimes I use peppercorns and when I do, I cut back on green chilies from the below list.
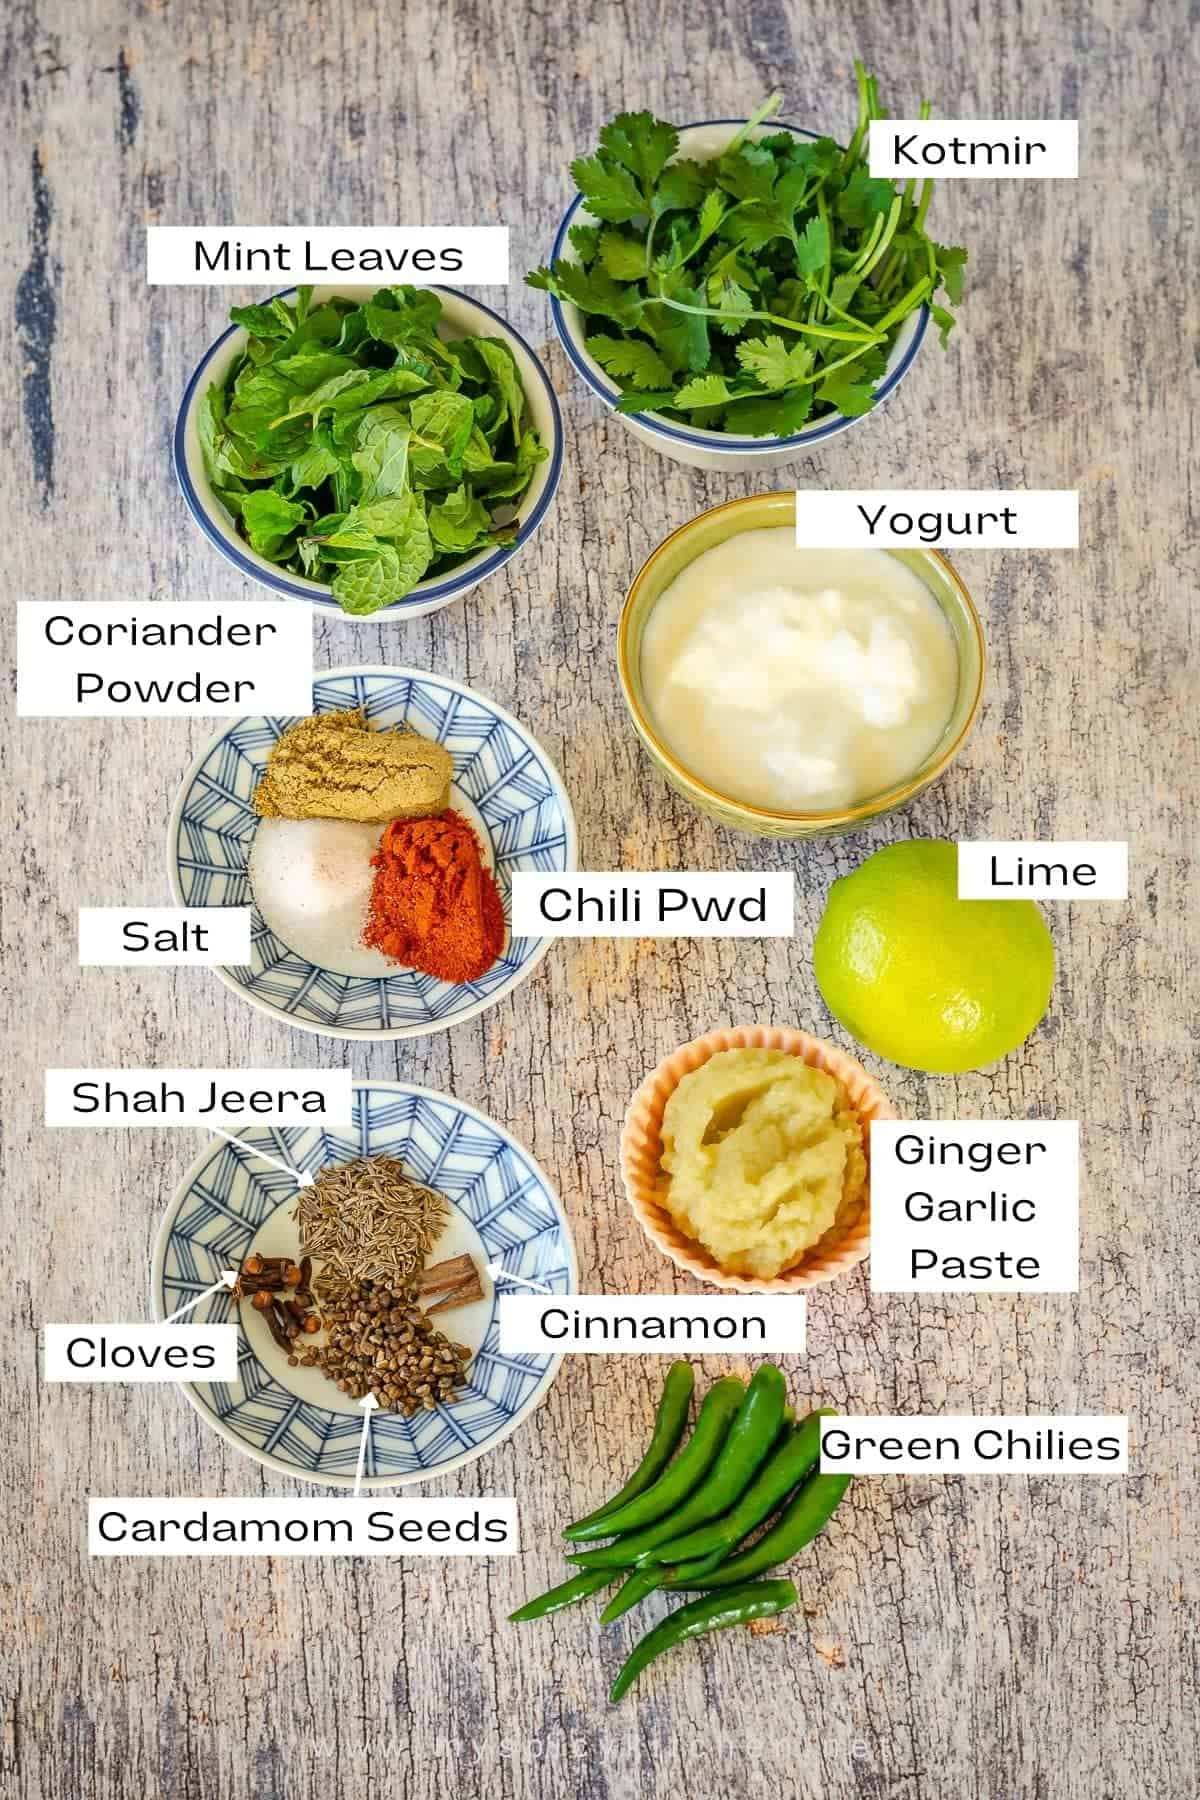
Marinade - Ingredients are basic to most Indian kitchens. Yogurt, ginger garlic paste, green chilies, chili powder, coriander powder, garam masala, salt, mint & coriander leaves, salt and lime juice. and off course peeled and deveined shrimp.
- Yogurt - use thick yogurt. Sometimes I use mixture of Greek yogurt and fat free yogurt.
- Ginger Garlic Paste - I use homemade paste and when using store bought paste, you easily cut back on almost half the quantity.
- Shrimp - for this recipe, I bought shell on shrimp, peeled and deveined at home. When using frozen shrimp, especially peeled ones, thaw the shrimp completely before using. Leave it in warm water for at least half hour to completely thaw shrimp or overnight in the refrigerate and then run under warm water.

Cooking Rice - Rice, whole garam masala ingredients, coriander & mint leaves, ginger garlic paste, salt and oil. Whole garam masala includes cloves, cardamoms, shah jeera, cinnamon, bay leaves and biryani flower.
Rest of the ingredients - Onion for frying onion slices and saffron infused milk when layering biryani.
Instructions
There are three components to preparation of biryani. Marinate the protein, partly cook rice, arranging protein & rice in layers and cooking in dum style.
Marination
Grind garam masala powder. Chop coriander and mint leaves. Clean shrimp, squeeze out as much water as you can and marinate with marination ingredients. Marinate for half - one hour. Image #1 in below collage.

Rest of the preparation
Wash rice and soak in water for at least 30 minutes. Slice onions, fry in oil until golden brown (image #2 in above collage) and keep aside. In bowl take saffron, milk and microwave for minute and keep aside (image #3).
Cook Rice
10 - 15 minutes after soaking rice, take large pot, fill it wit water and bring to a boil. For 3 cups rice, you will need at least 2 ½ - 3 quart/liters saucepan or a pot.
Once water boils, add all the ingredients listed under cooking rice, soaked rice and bring to a one good boil. this takes about 3 minutes on my stovetop (image #4). Reserve about a cup of water and drain rice to a colander.
Assembling & Cooking on Stovetop & Rice Cooker
You can cook on stovetop in a wide saucepan or a saute pan and that's what I used for step by step pictures. This how I do these days. Before I perfected cooking biyani on stovetop, I use to cook in rice cooker. I shall give those instructions as well.
Spread half the oil in a saute pan or rice cooker. Arrange shrimp at the bottom of the pan. Spread half the rice over shrimp, half fried onion and half saffron milk. Repeat this step again with remaining rice, onion and milk. Lastly pour reserved water from cooking rice.
Stovetop - Place 2 sheets aluminum foil on the pan which should be wider than the diameter of the pan, and then cover the pan with the lid. Fold the extra foil around the pan such that it seals the pan and the lid. Use narrow sheets of foil foil to seal around the pan.

Place heavy object on the lid. I place a wok upside down and on it, cast iron pans. You can use your weight lifting dumbbells or a heavy mortar pestle. Cook on high flame for 10 minutes, lower the flame and cook for another 20 minutes on low. Let sit for at least half hour before serving.
Rice Cooker - Arrange shrimp and rice in the inner pot. Cover thee pot with the lid and put some heavy object to lock the pressure inside. Turn on the cooker. Once it shuts off, rest for at least 30 minutes before serving.
I have a basic rice cooker with a simple lid. I have not tried cooking biryani in electric pressure cooker or a fancy rice cooker with a locked lid.
How to serve?
Serve Hyderabad prawn biryani with raita or salan. My favorite is with salan or without any side dish. My husband likes as is or with salan, chicken shorva or mutton shorva.
FAQ
Yes you can. In fact, here in US, I always end up using frozen shrimp. When using frozen peeled shrimp, thaw shrimp completely before marinating.
Texture of the biryani depends on how long you precooked the rice. If you feel rice is overcooked, cut back on the liquids (saffron milk+reserved water). When rice is undercooked, add more liquids.
If your biryani itself is mushy and over cooked, it cannot be fixed. However, if the biryani is under cooked, immediately cover the pot and let it sit for few minutes. Rice will cook in the steam. If biryani is cold, sprinkle some water and cook on low flame for few minutes.

Detailed Shrimp Biryani Recipe
📖 Recipe

Shrimp Biryani
Equipment
- 1 2 ½ - 3 quart Saucepan
- 1 3 quart wide pan
- 1 Frying Pan or Kadai
- 1 Colander
- 1 Aluminum Foil
- 2 Small Bowls
- 1 Measuring cup & spoons used a measuring cup that comes with rice cooker, 180ml.
Ingredients
Biryani Masala
- 8 Coves
- ½ teaspoon Cardamom Seeds
- ½ teaspoon Sahajeera or Black Cumin
- ½ inch Cinnamon Stick
Marinade
- 2 lbs Shrimp, raw and shell on I used 16-20 count wild shrimp
- ¾ cup Yogurt
- 3 tablespoon Ginger Garlic Paste
- 1 ½ teaspoon Chili Powder
- 1 teaspoon Coriander Powder
- 12 small Chilies split into two
- 1 ¼ cup chopped Mint Leaves
- 1 ¼ cup chopped Cilantro ~ Coriander Leaves
- Biryani Masala
- Juice of 1 lime ½ cup
- 1 ½ Salt adjust to taste
Spices for boiling rice
- 6 Cardamoms
- 3 Cloves
- 2 Bay Leaves
- 1 Bay Fower or Biryani Flower
- 1 teaspoon Sahajeera
- ½ teaspoon Ginger Garlic Paste
- 1 tablespoon of Oil
- First Full of Salt
Other Ingredients
- 1 Large Onion, sliced
- ¾ cup Oil
- ½ teaspoon of Saffron strands
- ¾ cup Milk
- 3 cups Rice, soaked for 30 minutes
- 1-2 tablespoon Ghee or Butter optional
Instructions
- Peel shrimp, wash and squeeze water from shrimp and keep aside. Check notes for tips when using frozen shrimp.
- Grind all the ingredients listed under biryani masala to a fine powder.
Marinade
- Take all the ingredients listed under marinaded in bowl, keeping aside ¼ cup each of mint and coriander leaves. Mix all the ingredients of the marinade and marinate for at least ½ - 1 hour. Prawn biryani does not require too much of marination.
Other Preparations
- In pan heat oil and fry the onions until light golden brown. You can use a separate frying pan or use the same pot in which you are going to cook biryani in. Keep aside fried onions and ½ the oil.
- Soak saffron in hot milk.
Cook Rice
- In a big pot bring water to a boil, add all the spices for boiling rice and mix well.
- Add rice and cook for 2 ½ - 3 minutes, one good boil, that is rice should roll over with boiling water. At this point rice is 40-50% cooked.
- Reserve 1 cup of water, though you will need only ¾ cups of water.
- Dump rice into a colander or a strainer and keep aside. Once this step is ready, immediately assemble biryani for dum style cooking.
Assembling & Cooking
- Now its time to arrange shrimp and rice in layers; one layer of shrimp and two layers of rice. Then cook on stovetop or rice cooker. These days I prefer stovetop and use to cook in rice cooker over a decade ago.
- In wide saute pan or rice cooker inner pot, pour ½ the oil at the bottom, arrange shrimp and sprinkle some oil on top of shrimp. For quantity of rice mentioned in the recipe card, you will need at least 3 qt pan/pot and 5 cups cooker, if using a rice cooker.
- Arrange ½ the quantity of boiled rice on shrimp, sprinkle some oil, ½ fried onions and ½ saffron milk.
- Repeat the above step for the last layer; spread the remaining rice, sprinkle remaining oil, fried onions and saffron milk.
- if using ghee or butter, sprinkle it on top layer. If using butter, cut into small cubes or melt and pour on top layer.
Stovetop method
- Place 2 sheets aluminum foil on the pan which should be wider than the diameter of the pan and then cover with the lid.
- Fold the extra foil around the pan such that it seals the pan and the lid. Use narrow sheets of foil to seal around the pan.
- Place an heavy object on the lid. I place a wok upside down and on it cast iron pans. You can use your weight lifting dumbbells or a heavy mortar pestle.
- Cook on high flame for 10 minutes, reduce the flame to low and cook for another 20 minutes. Let sit for at least half hour before serving.
For rice cooker
- Cover the cooker and on the rice cooker.
- Put a heavy container on the top of the cooker lid so that steam doesn’t escape. Ii have a basic cooker and nor not the locking type cooker. So I put a heavy object on the lid. I have not tried this method in fancy rice cooker or electric pressure cooker with rice option.
- When the rice is cooked and the cooker turns of , let it sit for at least 10-15 minutes before opening the cooker.
Serving
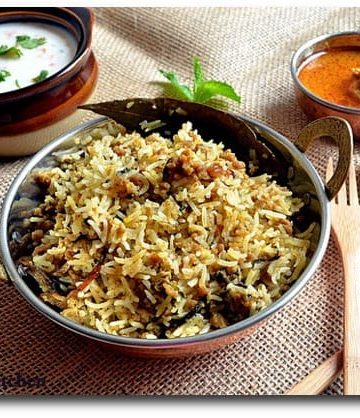
- Mix the rice and serve hot with raita or chicken shorva or goat shorva.
Notes
- Measuring Cup - I used the measuring cup that comes with the rice cooker. 1 cup = 180 ml. All the cup measurements are with this cup.
- Shrimp - If using frozen shrimp, make sure it is completely thawed before marinating.
- Biryani Masala - You can use store bought Biryani mixes instead of biryani masala. I have used Shan Biryani mix before and it tastes good. You can substitute 3-4 teaspoon Shaan biryani mix and adjust chili powder and chillies to your taste.
- Peppercorns - I did not use peppercorns in biryani masala. Sometimes I use it. For quantity mentioned in the recipe, I would use 7-8 peppercorns and cut back on number of green chilies.
- Shrimp Rice Ratio - For 2 lbs of peeled shrimp use 3 ½ cups of rice. When using 2 lbs of unpeeled shrimp use 3 cups of rice. This is the ratio we prefer. However, if you prefer more rice, add ½ cup of more rice. Adjust quantity of rice depending on how you preference.
- Nutrition - Values listed are approximate.
Nutrition


Like the recipe? Pin It for later!
Signup to the newsletter to receive latest updates from MySpicyKitchen.
This post was originally published in Jun 2008. It is republished with new content and images.
Radha says
Great step by step instructions. I bet this must have been delicious!
Harini says
Very flavorful ingredients. I have recently come to know that stone flower is used in Biryani masala. That definitely enhances the flavor.
Srividhya says
Loved the detailed procedure and those step-wise pictures. The biryani has come out really well. The grains so looking perfect and not so mushy.
Vaishali says
We do not eat sea food, but I am sure the biryani is super flavorful with the typical herbs and spices from Hyderabad.
I can always replace the shrimp and make a vegetarian version. Good one.
Deepika says
Hi ,how much time on stove top for this recipe. I was searching for this type of biryani with raw prawns and i found urs. Thank u
MySpicyKitchen says
Deepika, I have not cooked prawn biryani on stove. This is my suggestion, cook on high for 8-10 minutes until steam escapes from the vessel and then reduce to low and cook for another 20 minutes. Turn off the fire & let it rest for 10-15 minutes. Do remember to use an air tight lid. Check this biryani post steps 11 & 12... http://www.myspicykitchen.net/2008/07/17/chicken-biryani/
I am copy pasting the steps here -
Now, we need to seal the the container and make it air tight so that the steam doesn’t escape when we cook. In India, flour dough or a big cloth is used to seal the container and the cover together. Here, I use an aluminum sheet. take 2 sheets of aluminum foil (the sheets should be bigger than the diameter of the sauce pan) and place it on top of the sauce pan and then cover it with the lid. We will have aluminum sheets between the pan and its lid. Since we took the sheets bigger than the diameter of the pan, we will use that to seal the pan and the lid.
Put a heavy object (motor pesto or heavy pan or skillet) on the top of the container, so that the steam doesn’t escape easily.
niti says
this looks really yummy....i'm gonna try it today.Thanks
Do let me know how it turns out.
Jess says
Such a nice recipe, today was my first time making biryani in a rice cooker. I didn't have enough shrimp and used anchovies with shrimp instead. I also fried curry leaves with the onions. Was very pleased. Thank you for your site, I have really loved trying out some of your recipes.
ipshita says
Thnx for this recipe..i always wondered if Biryani could be cooked in the rice cooker. I follow the oven method...but this makes my job easier