
Couple of weeks ago I baked baby themed cookies for my cousin’s baby shower. She was planning on baking these herself and I volunteered. Though I volunteered to bake and frost the cookies, I was a bit apprehensive as I never frosted cookies and as a matter of fact, I am not a good cake decorator either. I asked Rajani, one of the cake decorating queens in our group for some ideas and she directed me to Gayathri's blog's. I followed the recipe Gayathri used for glazed icing. The only difference between Gayathri's recipe and the source recipe is the usage of liquid glucose instead of corn syrup. Since corn syrup is easily available here, I followed the source recipe.

You can gauge my cookies decorating skill looking at the cookies and how novice I am at it. I need to practice this more often to get a perfect outline of the cookies. The week I baked and frosted the cookies, it was gloomy. It rained all day on the day I frosted the cookies. I was so tired after decorating the cookies that I was in no mood to setup my photoshoot. Lighting at the party was equally bad and could not capture decent pictures. Pardon the quality of the pictures and all these pictures were taken with my high end point and shoot camera.
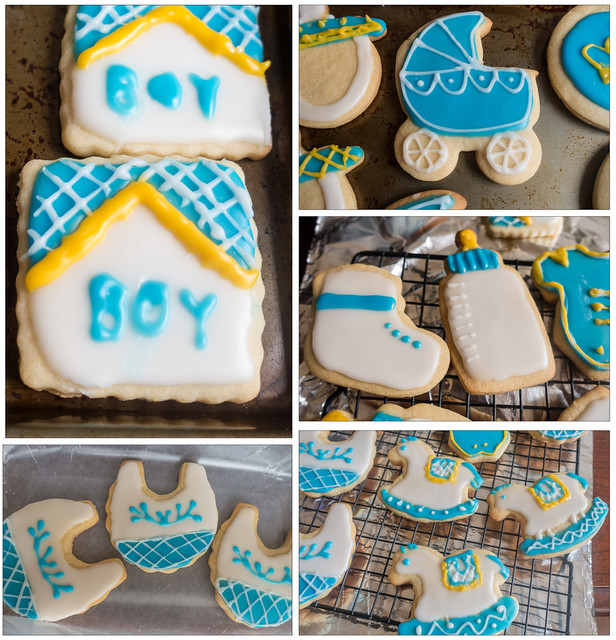
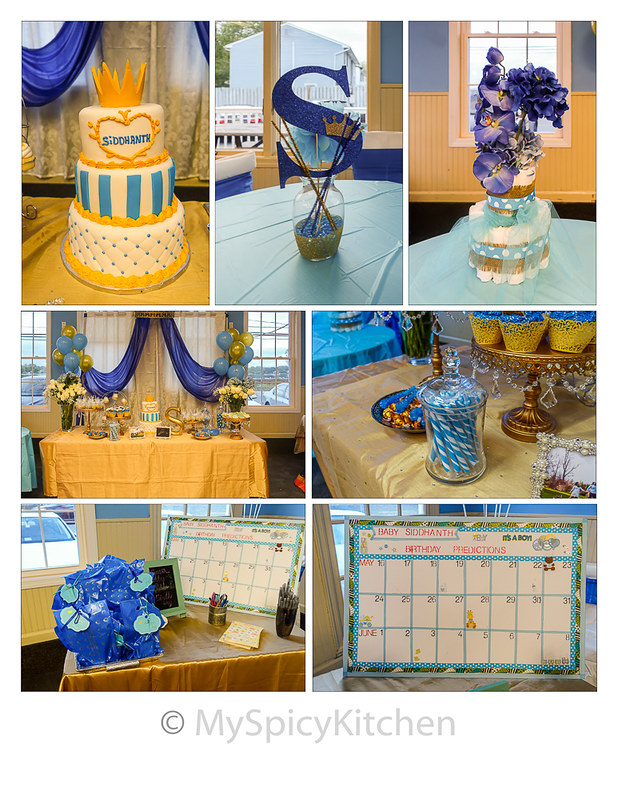
I had planned on cooking something else for today and then I realized the icing would fit the 3 ingredient recipes theme. The recipe calls for 4 ingredients and the fourth ingredient is optional and is used in minuscule quantity. Second, I wanted to post the cookies and pin some of the party ideas on Pinterest and it seemed apt to do this recipe for this week. Since I am not really happy with the party pictures, I made a collage instead. Third, I am not very happy with the decoration of the cookies and I also wanted to do a detailed post with step by step instructions on decorating cookies. Most often, the posts I intend to redo never happen and wanted to document this preparation right away before I forget how I did it. I shall try to do another post on decorating cookies with step by step pictures for better understand. I hope that happens soon.
As I mentioned few months ago, I am using Lightroom for post processing and am slowly learning to use it more effectively. The collages in this post are made in LR. For those of you using adobe products, it might not be a big deal but for me, it is taking one step at a time. 🙂
Reference Links:
I used this recipe for the sugar cookies. I shall share the recipe later.
I referred to this video for icing consistencies.
I used this Wilton baby themed cookie cutters which is also available in Michael's for $5.49 and this baby shower cookie cutters. FYI, Wilton cutters are of decent size and the cutters from the other set are huge, about 4".
Glaze Icing Recipe
Source: I am Baker
Ingredients:
- Confectioner’s Sugar 1 cup
- Light Corn Syrup 1 tbsp
- Milk 1 tbsp. (more depending on how it is used)
- 1 - 3 drops Lemon Juice (opt. Real Lemon or fresh. I used fresh lemon juice)
Preparation:
- Sift confectioner’s sugar. This is optional and I skipped this step.
- Take all the ingredients in a bowl and mix until combined. I used a handheld mixer but a whisk can also be used.
- If using liquid colors, add less milk when making the icing. Once the color is mixed, add more milk to get desired consistency.
- Depending on the usage, add less or more milk. If the consistency is thin, add some confectioners sugar and if it is thick, add some milk or water. I used milk.
- Keep the icing covered at all times as it can dry up very fast. If the icing dries up, add some milk and mix it to required consistency.
- According to the recipe, frosting will stay good for days in the fridge.
Consistency of Icing -
- Outline - For outlining the cookies, add less milk. To the above recipe, you can add about ½ - ¾ teaspoon of water.
- Flooding - The method of filling the cookie with icing is called filling or flooding. Cookies are first outlined and then filled with icing. The outline acts as a dam and the the icing is thinner than the icing used for outlining. Need to add about 2 - 3 tsp. of water/milk for cup of icing. To check if the icing has the right consistency, drop a spoon of icing and the tracks that form when icing hits the surface should disappear in 10 seconds.
- Top coating - The method of caoting the cookie without an outline is top coating. For this coating, the icing should be thicker than the consistency of icing used for flooding and thinner than the outline consistency. When top coating the cookie, drawing an outline is not required. For 1 cup of icing, add 1 ½ - 2 ½ teaspoon milk. When icing is dropped from a spoon, the tracks should disappear in 15 seconds after hitting the bowl.
- Though I did my homework on different coatings and consistency, I did not quite follow the above guidelines. I went with the feel. However, I strongly recommend using the consistency guideline when making the icing.
Decorating the cookies:
- Top coating - I used a mini spoon with a round handle to coat the cookies. Icing can be poured with a spoon as well but I found round handle was easier. Drop the icing on the cookie and spread it with the same handle to coat the cookie. Keep a toothpick handy and if there are any air bubbles on the coating, remove immediately by punching the bubble, before the coating dries up. If not, the coating will not be smooth. You can see some air bubbles on some of my cookies.
- After coating all the cookies, let them dry. By the time I coated all the cookies, the cookies that were coated first were ready for outlining.
- Outline and details - I used store bought piping bags for outlining the cookies. Piping bags can be made at home but I did not want to stress myself and bought a pack (12 bags) for $2, on sale.
- Fill the bag with icing and cut the tip of the bag. Make about ⅛” cut, draw a line to see the thickness of the line. If the line is very thin, make a bigger cut.
- Outline the cookies and add details on each cookie. You can do a Google search for decorated cookies or search Pinterest for ideas.
- For 25 cookies, I made icing with 4 cups of confectioner’s sugar. I had some left over icing. I would say icing made with about 3 cups of confectioners sugar should suffice frosting 25 cookies of these baby themed cookies. Quantity of icing depends on the size of the cookies and the decoration.
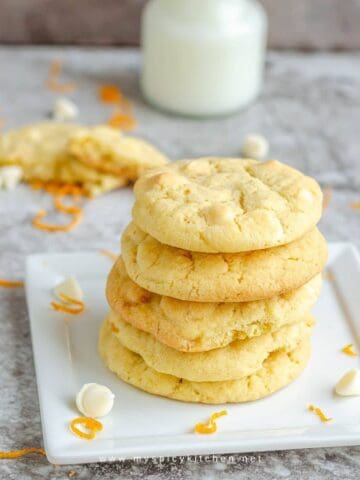
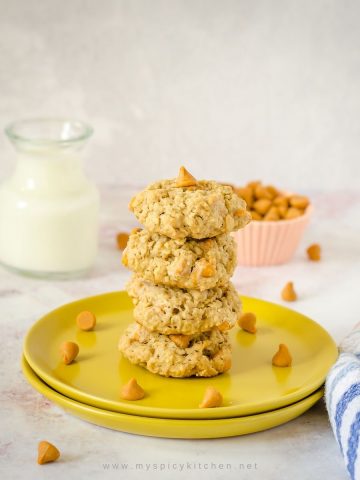
Related Recipes
Signup to the newsletter to receive latest updates from MySpicyKitchen.

Pavani says
Very informative post Usha. I think you did an excellent job of decorating the cookies.
themadscientistskitchen says
Usha these are awesome cookies, I love the job you done. They look awesome.
Srivalli says
As I said you are always so hard on yourself..well that leads to more progress no doubt..personally I love those frosting..great job..
Hiba says
Hi .,Usha.
I was dazzled at the cookies
It is simply superb! The colours and the theme . All perfect.
Gayathri Kumar says
Cookies look so cute Usha. Beautifully decorated...
sapana behl says
Those cookies looks so adorable.And the icing is just perfect.
Priya Suresh says
Omg, those cookies are simply adorable, and the colour of the icing looks absolutely gorgeous and stunning.
Vaishali Sabnani says
awesome..i loved these when you shared them on wats app..they are on my to do list, but a couple of things make me nervous..though I wonder why...
Varada says
The cookies are awesome! The color choice, shapes everything is really good!